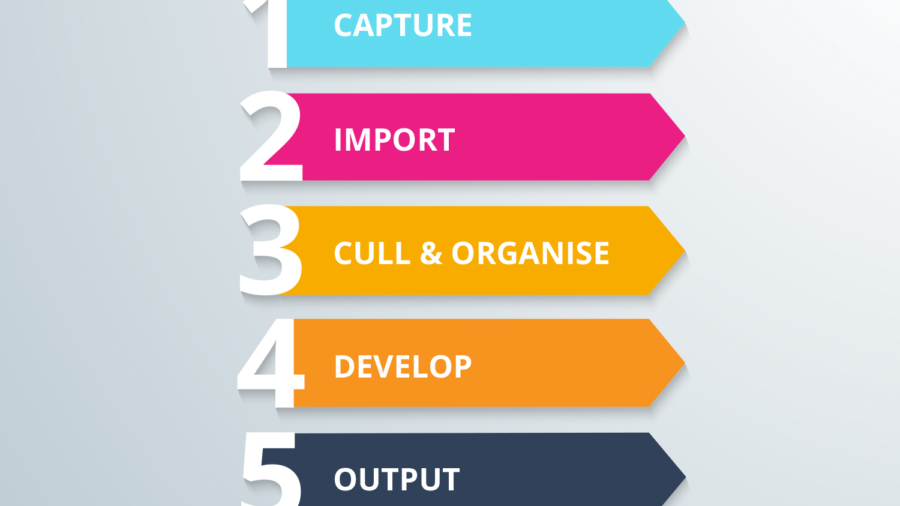
Things to keep in mind while finding the perfect photo editing workflow for yourself
Remember when we talked about the importance of Photo Editing Workflow? We truly believe that it is key to efficiency and a consistency in quality. Although there is no one template for a good workflow, we’re sure that every successful professional photographer has one. There is no right and wrong to a workflow and it can continue to evolve over time. What is important, if you are a photographer, is to have one in any shape or form that works for you. Not having a workflow at all can be quite a deterrent to your growth and consistency as a professional wedding photographer.
A solid workflow system makes sure that the task is completed well, using the fewest steps possible. It is flexible enough that you can go back and make changes without compromising on image quality. A competent system additionally safeguards your data as well as delivers a good product – great photos – at the end.
In this post, we will talk about the system we follow in the studio and how a workflow progresses in general. If you don’t already have a structure, feel free to take this post as a starting point.
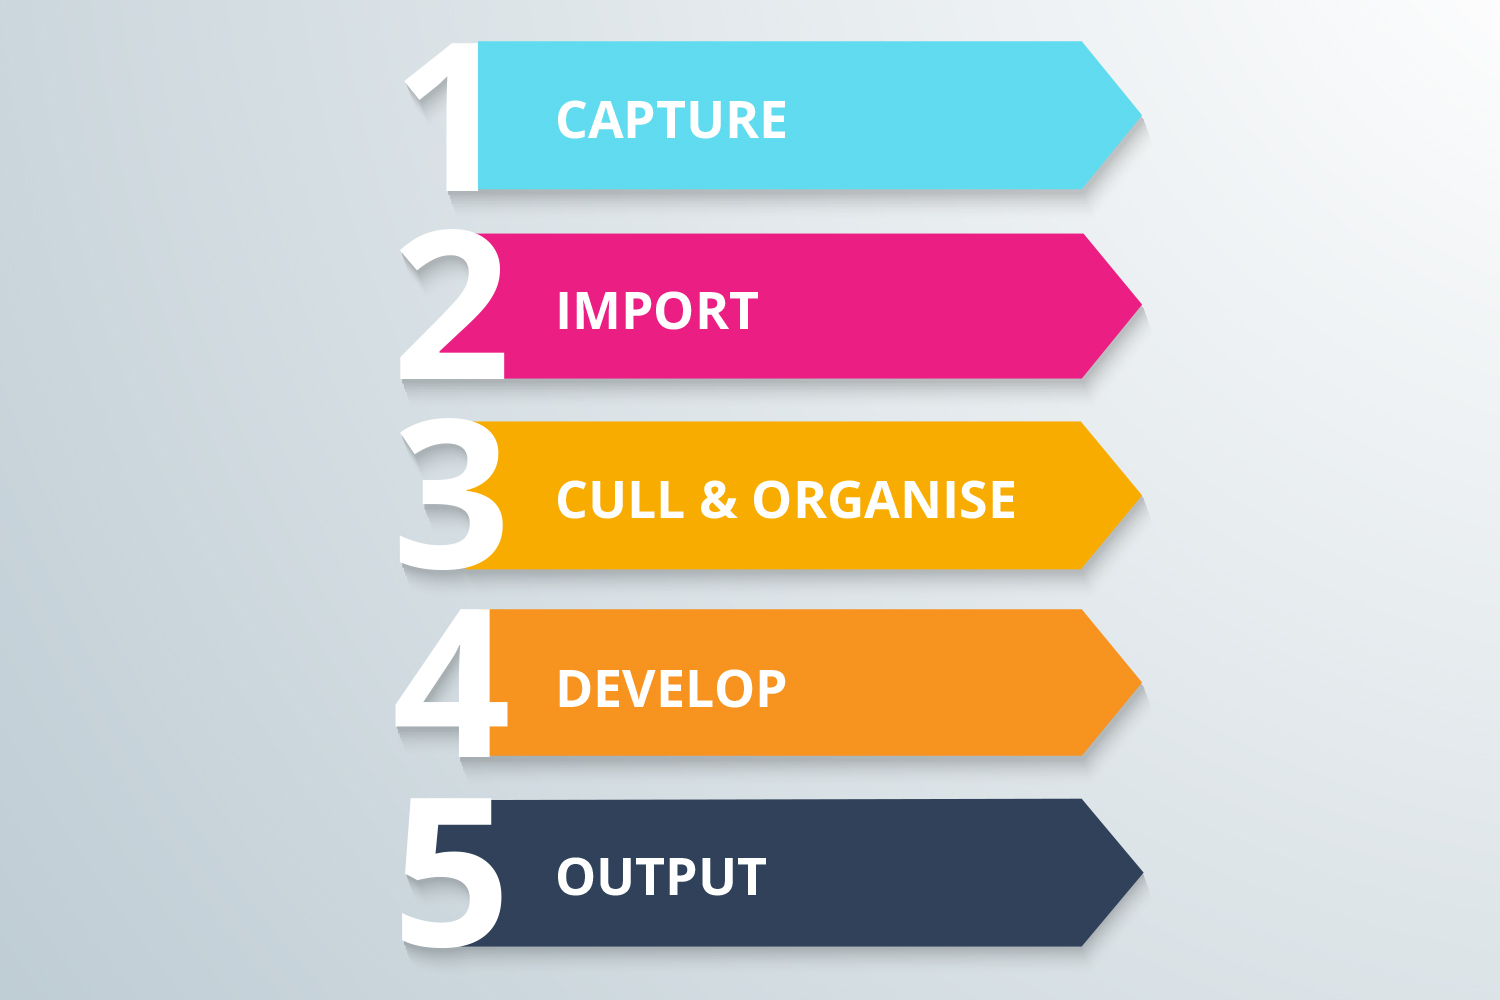
#1 While Shooting
Having enough memory cards is paramount when preparing for an assignment. It’s a good idea to carry enough so that you don’t run out of space in the middle of a shoot. As a rule, we never overwrite any cards during a wedding at all. Over the years of shooting weddings, we’ve figured out how many cards we need for a 3-day wedding assignment shot by 2-3 photographers and always carry enough memory cards and more. A few extra cards can do no harm.
A wedding assignment consists of a gamut of candid/documentary and posed photos. Therefore, often, we have to set up the composition, lighting wait for that right moment or expression. Now feel free to click more pictures to get the right one but be judicious about it. We don’t suggest shooting in burst mode the entire wedding. It’ll only serve to create double the amount of photos and more headache for you later.
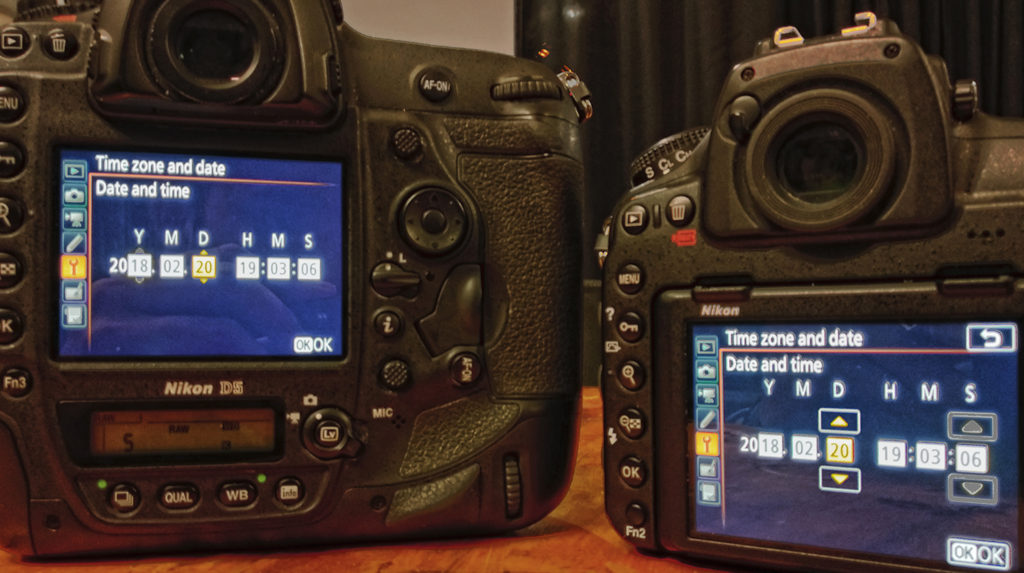
You should also make sure that all the cameras being used by your team are time-synced. Often, we’ve saved precious time looking for a different angle of the same event, because we knew the time of day it happened and that two photographers in the team were bound to have different POV to the event.
Shooting in RAW is another important factor. Although it makes the files rather heavy and you may need a larger number of memory cards to accommodate shots from a single wedding, in our opinion, it’s worth it. The flexibility it gives you at the editing stage and the ability to rescue otherwise unusable images is incredible.
#2 Import
The next step is importing images from the memory cards into storage devices. Be careful and organised while copying images to minimise data loss. The only keyword to this step: Backup! Backup! Backup! We cannot stress enough about the importance of having a backup for your images!
Our mantra for this step of the workflow is ‘3,2,1’. We keep 3 copies of all the data transferred onto 2 different mediums (hard-disk, cloud or LTO tapes) and 1 copy is kept at a different physical location than the other two (2 at the studio, 1 at home). If there is a natural or accidental disaster (fire, flooding etc) at one location, the other backup will be safe.
It also helps to have an index of all the data that you own. You can follow a manual method and log in the information into a spreadsheet every time you copy – which photos go into which card or hard drive, how many photos, etc. Or use a software like the Disk Catalog Maker to take screenshots of various disks for you.
#3 Organise and cull
After the photos are copied and backed up, the next step is to cull, sort and organise. The idea is to very quickly and efficiently reduce the population of your images to identify the ones you like and those you aren’t impressed with. At the same time, you want to organise them into buckets (basis various functions, days or even simply identify the priority level for edit and delivery) so you can be equally efficient in the editing and development stage.
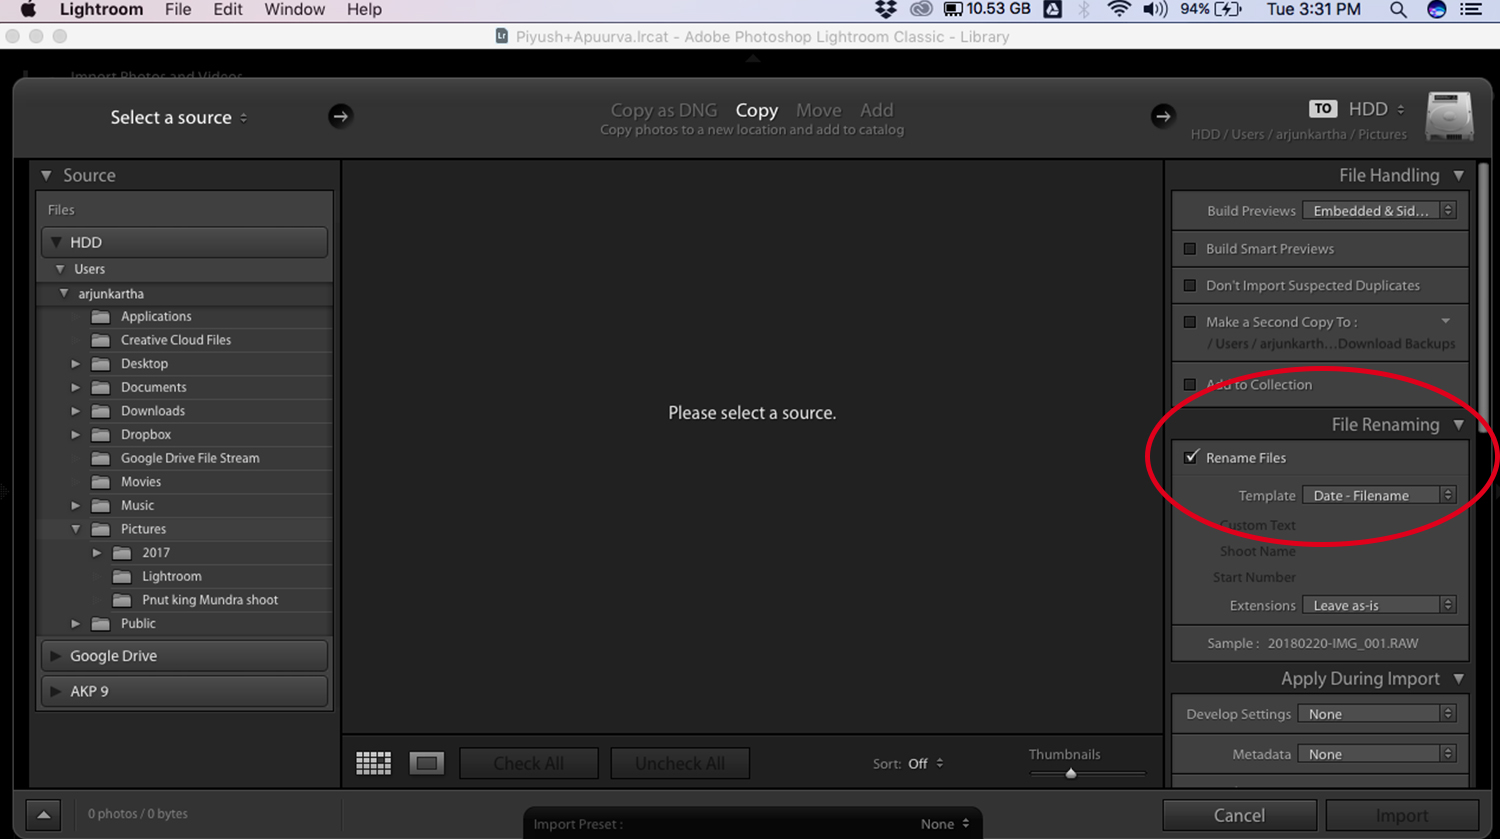
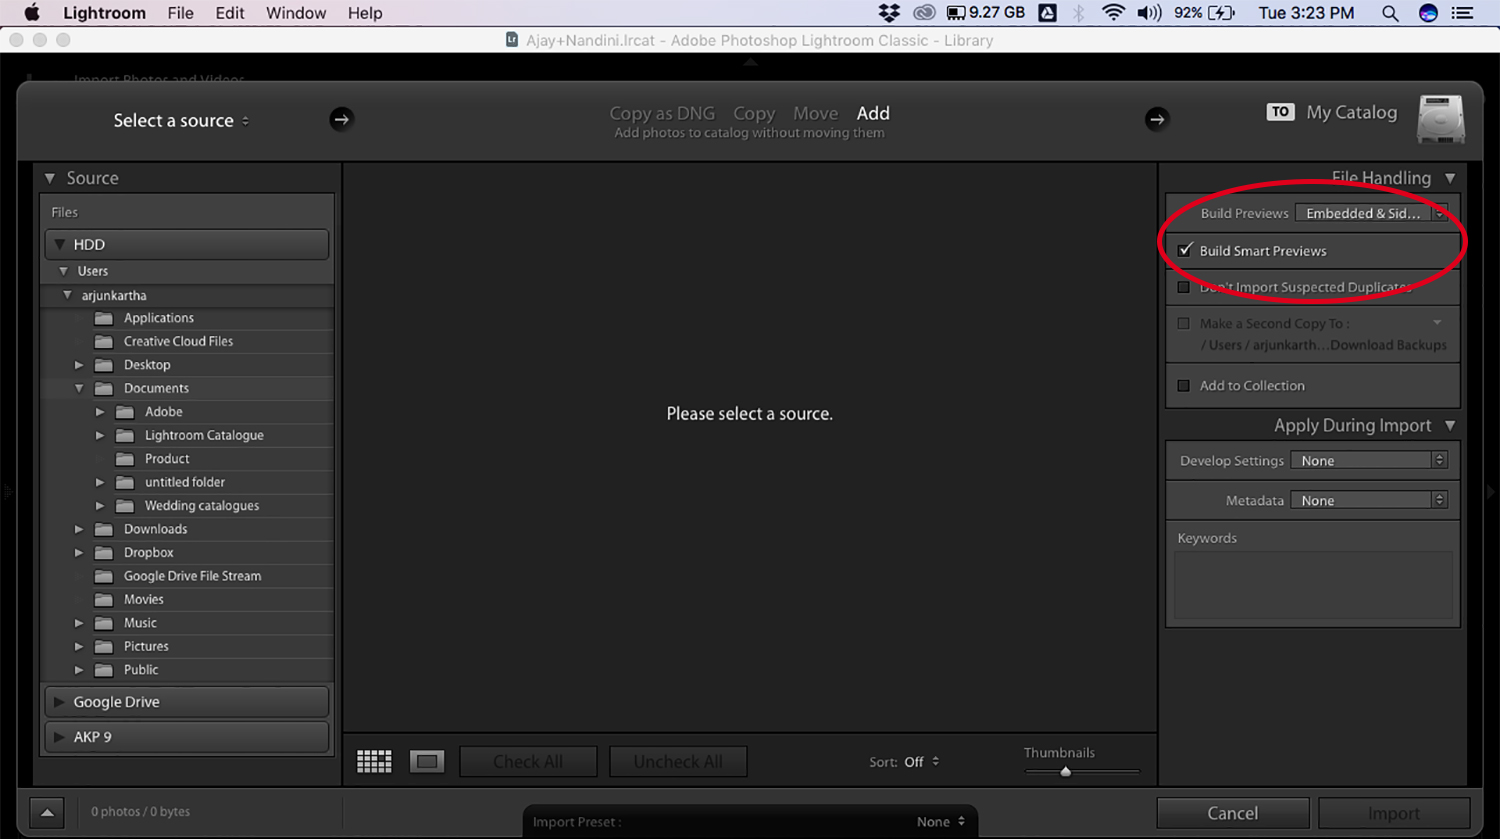
You can use various software to categorise your images. The most popular ones today are Photo Mechanic and Adobe Lightroom. We recommend re-naming the files during import, using details like the couple’s name, the date and location of the wedding, etc, to make the file names unique and easier to identify over time. If you stick with automatic camera generated file names, there’s a chance that there will be a duplication of names after a point. Also, make sure you choose the option to keep all metadata intact in the image. This will help you in identifying which camera shot the image, which team member captured it, time of day, etc.
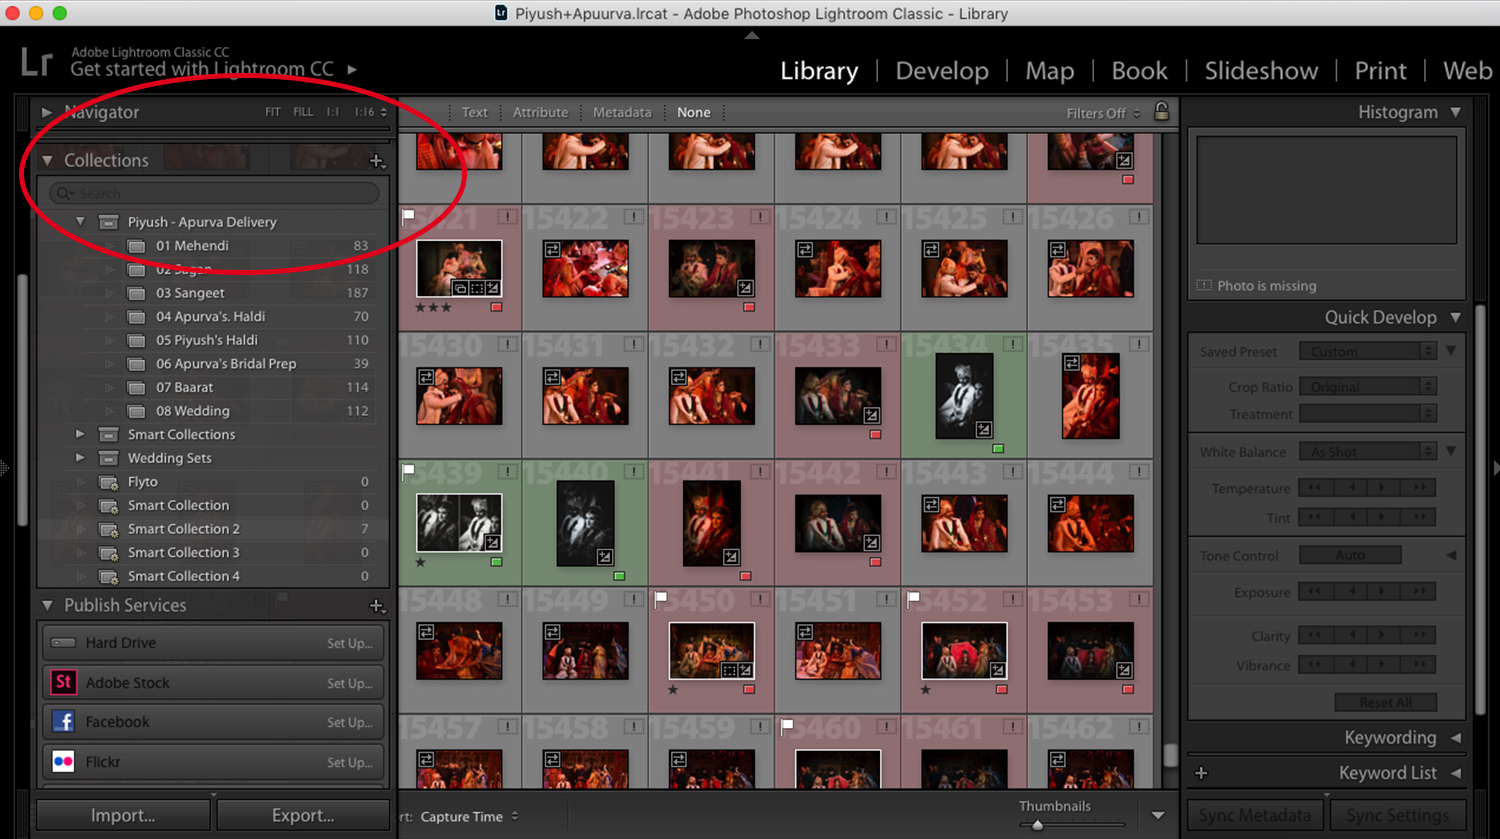
Unlike the old days, you don’t need to separate photos from different events to various folders while editing. Almost any software you choose to use today has options for making virtual copies, folders and collections. It is also a good practice to always work on the virtual copy of the image. This keeps your edit process non-destructive and allows you to revert to the original at any point, should you need to. Give them colour labels, ratings, flags and use other ranking methods to identify the ones you want to prioritise.
Therefore, this step helps you stay ahead of the game in two ways. One, it reduces the number of photos. Second, the labels will help you find specific photos in no amount of time! There is no need to be lost in folder canyon. You can easily sift out 20 highlight images from a wedding based on the ranking you gave them.
In companies where multiple people work on the same images, this step will help avoid any mismanagement of data. If everyone follows the workflow, one person can cull the data and label them with labels/flags/ratings. The second person can do a basic edit of medium priority photos. And a third person can find the high ranking images for a more detailed edit, re-touching or other special effects.
#4 Develop
This is the part of digital photography where post-processing or editing happens. After the previous step, you already know which photos you need to start working on. You’ve already identified which photos require special attention for highlights and portfolios. If you’ve made sure to shoot judiciously, composed & lit your shots well to get good in-camera results, then the development step will obviously be easier and quicker. But if you haven’t, then we hope you remembered to shoot in RAW so you can do maximum damage control!
As you all know, development of RAW images requires some basic steps like adjusting exposure, white balance, colour temperature, contrast, vibrance, saturation, sharpening and reducing noise if any. If you were to follow these individual steps for every single photograph, it could take weeks to complete one wedding set. And do you honestly have that kind of time?
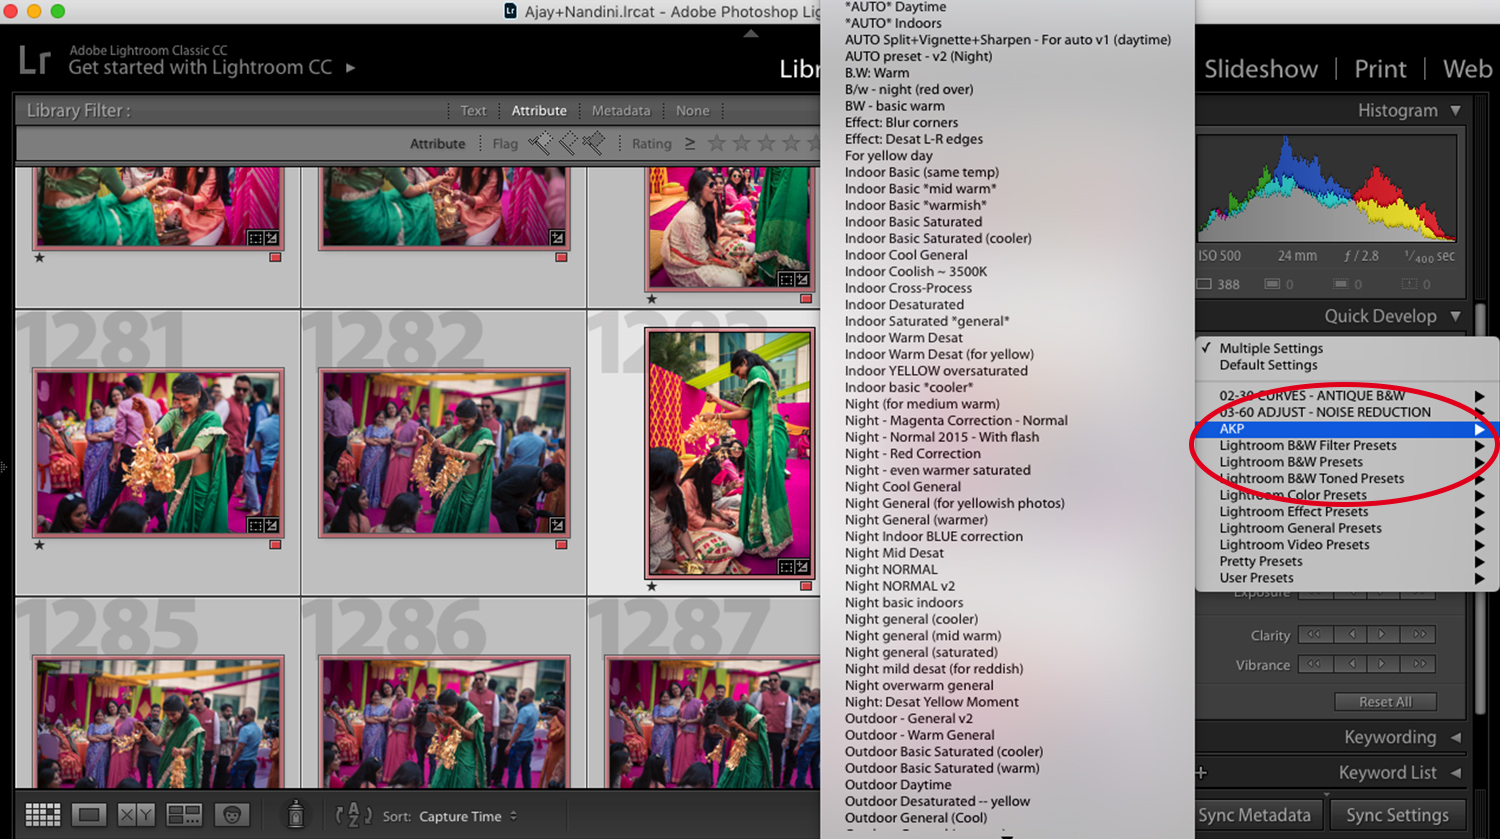
You can easily increase your speed and efficiency by using development presets! Purchase them online or create your own presets basis your style of shooting, the colour palette you like and the kind of photos you’ll edit. If you’re creating your own, like we have, then name them in a logical fashion, for example, ‘outdoor harsh light’ or ‘nighttime dance floor’. After you’ve used a basic preset for all pictures of a similar kind, you can always fine-tune each image as required. A preset for all similar images reduces the steps and speeds up the process, leaving you with enough time to give extra attention and special effects to your 5-star photos!
#5 Output
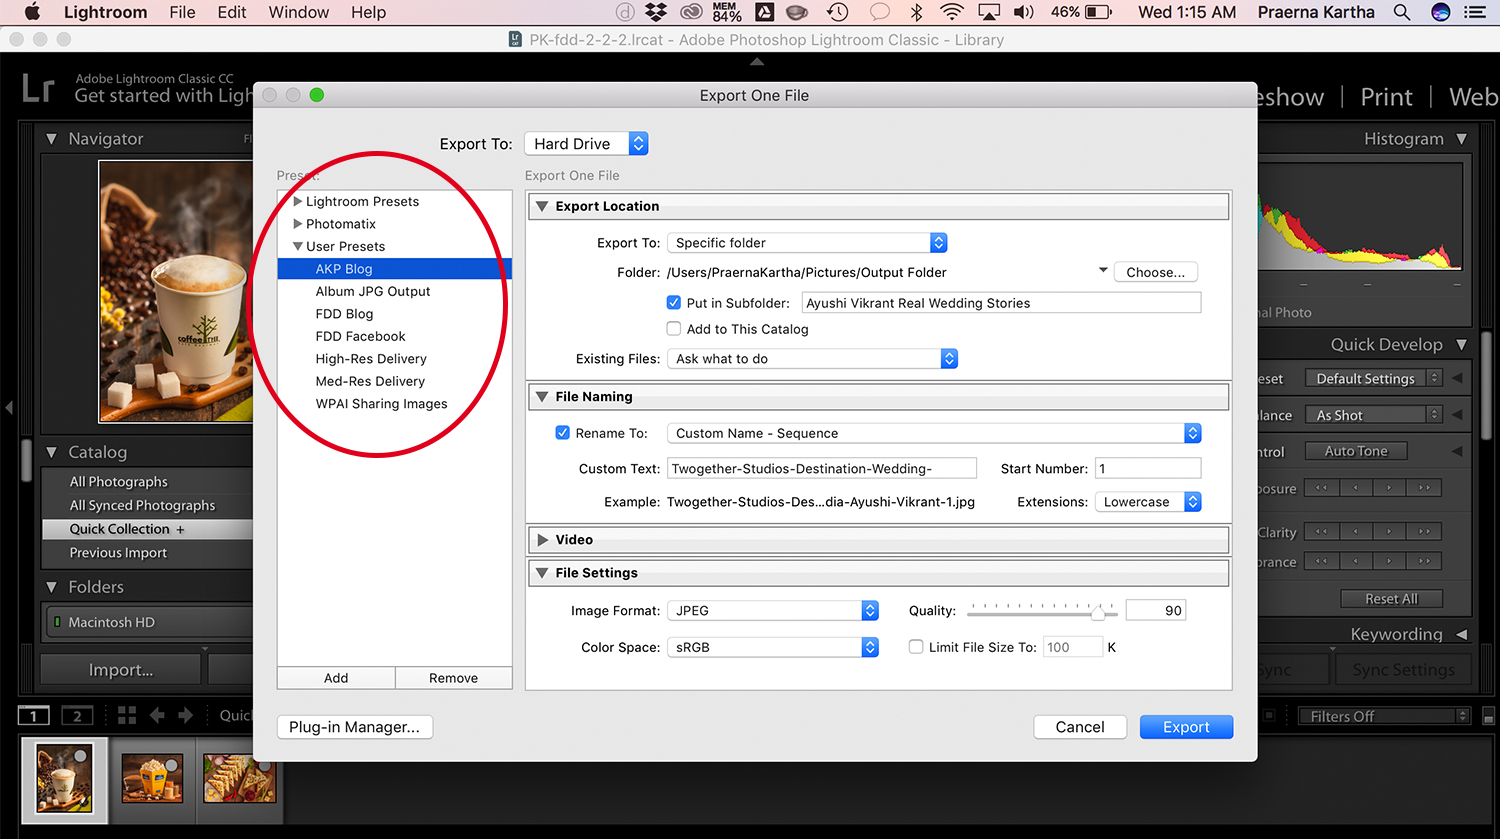
Now it’s time to think about using those photos. You need to output them for client delivery, creating archival prints, photo books or for sharing online. Most websites and social sharing platforms have different requirements in terms of size and resolution. Take time and research to find out what size and resolution works for different media. For printing reproductions, try a few different sizes and colour spaces to know which creates the best product. You can speed up the process and maintain consistency by creating and using presets for export as well.
Keep in mind that you should never resize images during import. Always edit them in their original size and resize only during the output process. Furthermore, always work on virtual copies of the master image. Never, and we mean never resize the master file. Since one image will need to be resized for various mediums, it is best to keep the original size intact. You can change them at the output stage according to the requirement.
Like we said in the beginning, having a workflow is very important. Having a good workflow is even better. In the absence of a workflow, you can face hassle at so many levels – losing photos, difficulty in locating them, duplication of data, destructive editing of original files etc and these are definitely not good for your business.
You probably have some sort of a system already in place. Now you just have to identify areas which cause you more time and work out a structure for it. Of course, a perfect system doesn’t magically happen overnight. We’ve spent years devising a system, which we’re sure we can also improve on. So, start today. Write it down or make a flowchart if it helps you. Whatever you do, put a system in place at the earliest, if you haven’t already!
Did this post help you get started on a system? Tell us in the comments. Got any questions about the process? We’d love to answer!
Add a Comment