
One of the questions I get very often (apart from “Which camera should I buy?“) is always tips on post production. This is usually a very difficult question to answer, and is just a little bit delicate – lest I propagate the “photoshop is magic” myth. I’ve known my style to evolve over the years, and I use post production to achieve a certain look that I’ve visualised when taking a picture. However, certain basics always remain the same – so here’s part 1 of a Lightroom production series of tutorials.
Making your photos pop with Adobe Lightroom
First things first. I have now transitioned from other software (Photoshop, Aperture, Leaf Capture…) to a place where I use Adobe Lightroom to do almost 95% most of my editing jobs. Adobe Lightroom is a powerful program to manage and enhance your images. It is rapidly becoming the best choice for the photographers who don’t necessarily need the depth of photoshop.
[alert color=”” icon=””]Stop! Now before you start to edit a certain image, always visualise how you want the image to look. Just because you have the tools, that doesn’t mean you have to start pushing ALL the sliders! :-)[/alert] [alert color=”” icon=””]Also remember, there is no formula to editing images. It all depends on your artistic vision – the tools are the same for everyone, and how you use it matters. I’m going to show you some of the things I do – the rest is up to you! [/alert]Adobe Photoshop Lightroom has a very extensive list of tools available. Naturally, Adobe had to figure out a way to ensure all the functionality is conveniently accessible, and yet not overwhelming at the same time. So instead of dumping everything into one place and creating a mess, they came up with the concept of Modules.
The Library is there to help you organize and manage photographs. Everything you need to help you find, import, sort and organize photographs is here. The Develop module without a doubt, is the most important Module of Lightroom where you will spend the majority of your time. It has a set of very useful, powerful and ergonomically laid out tools that are specifically tailored for editing images. If you’re new to Lightroom, you can ignore the rest of the modules for now.
(To learn more about modules : https://photographylife.com/lightroom-modules-explained)
1) Selection and Preparing image for processing
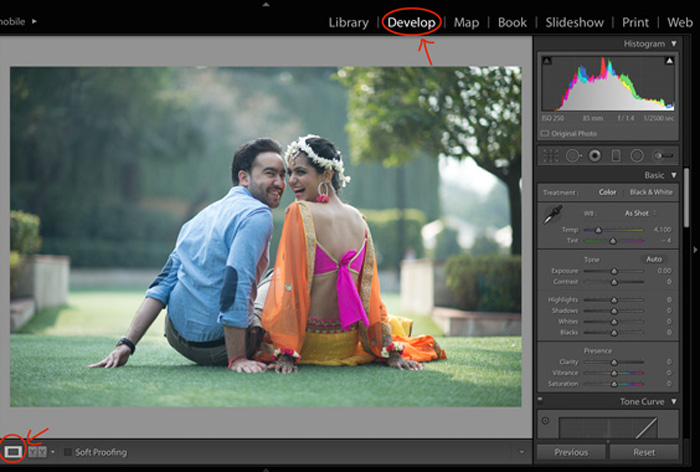
- Firstly, select the picture you want to edit and switch to loupe view after which you will be able to see your picture in the center space like the one below.
- After that make sure you are in the develop window
2) Step 1: Adjusting white balance
- At its simplest – the reason we adjust white balance is to get the colors in your images as accurate as possible (or to look the way you WANT them to).
- I usually try and nail my WB (or colour temperature) in camera. I always advise trying to get the basics right in-camera – it’s much easier to tweak images when they’re nearly correct.
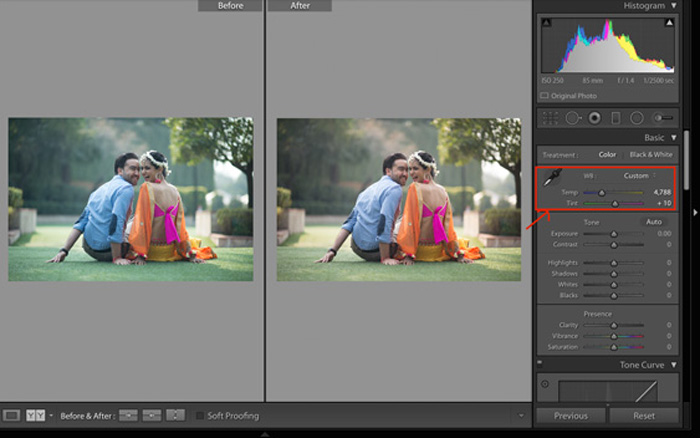
- Now, we will start with white balance, which is on the camera settings as you can see in the picture below.

- Manipulating white balance a bit can bring a totally different feel to the picture.
- Looking at this image I felt that making it a tad warmed would make it look better – so I increased the temperature and tint of the picture and you can see how it affected it.
3) Step 2: Adjust the basics (Exposure, shadows, whites etc.)
- While it’s important to nail the exposure in-camera, I sometimes feel that making an image a stop or so brighter makes a world of difference. So, to make the picture brighter we need to work on its tones.
- We will start from exposure, it can be added or reduced to change the overall brightness of the picture.
- Brightness can also be manipulated by adjusting the details of highlights and shadows. These two sliders work in opposite directions. The more detail you want in your highlights the lower you’ll drop the slider, for more detail in the shadows you’ll increase the slider.

4) Adding colour: Making images pop
- I always shoot on RAW format as it gives me more flexibility to edit. RAW photograph contains everything that your camera was able to “see” between the time that the shutter was opened and closed and it has left the decisions on how to process this data up to you. Due to this certain highlights and colours looks muted and therefore, we need to enhance the colours through vibrance and saturation.
- Even by making slightest changes in these components we can make a huge difference.
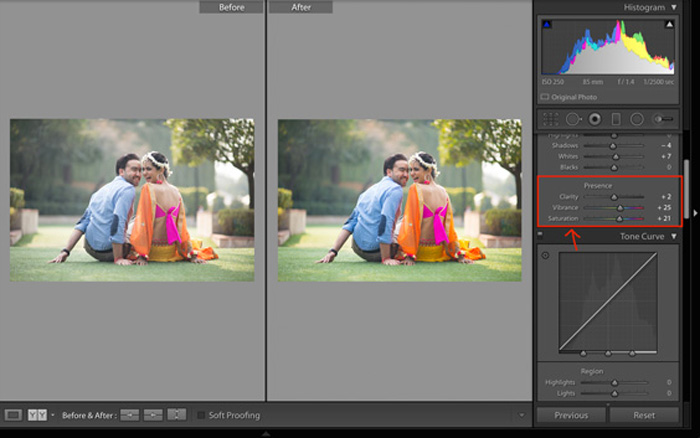
- It’s VERY EASY to go absolutely berserk with the saturation slider – remember, use it – but just enough to make the colours pop without looking absolutely artificial.
- I’ve bumped up both just a little bit – which you can see in the photo below.
5) Adding the secret sauce: Split Toning
- Split toning gives picture a whole new perspective by simulating old-school film effects (think Instagram – this is how those jazzy filters were made!)
- It lets you add some colour into your highlights and shadows which can adjust or decrease the effect of some major colours (to get rid of an orangey tone, try adjusting toward the blues).
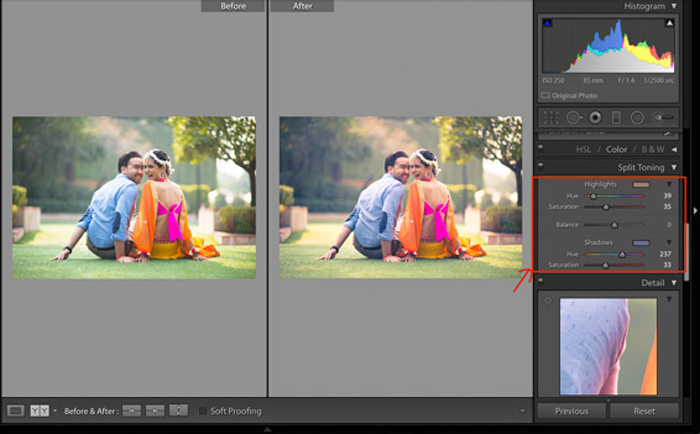
- After choosing the colour you can also set the saturation level.
- One of my favourite “go-to” settings is what I’ve done here – a shade of yellow into my highlights and a little bit of purple into my shadows.
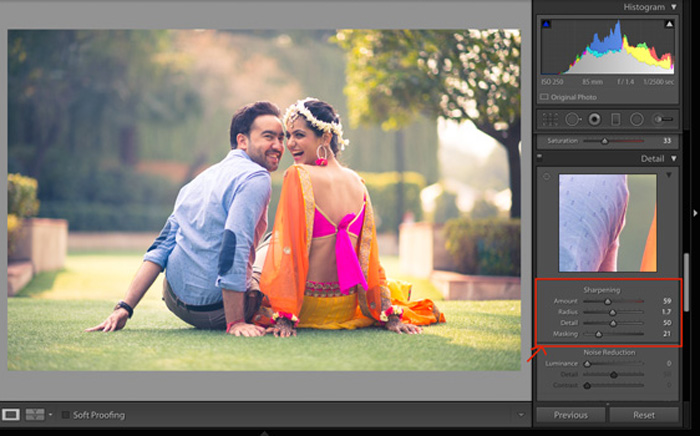
6) Sharpen – but properly!
- Now, we have come to one of the most important part of editing that is, sharpening.
- Remember: if you haven’t nailed your focus, no amount of sharpening can help a blurry image. However, if you’ve focussed well – sharpening can make a world of difference. Lightroom has a nifty sharpening system which does away with the “Unsharp-Mask approach” that a lot of photographers prefer in Photoshop).
- By setting an amount, you decide the amount of sharpening you want to apply to an image. Zero means no sharpening is applied to the image. The higher the number, the more sharpening you will see.
- Radius determines the size of the sharpening area around the edges.
- Detail as the name suggests, the detail slider controls the amount of sharpening on the edges or “details” of the image.
- Remember: DO NOT over sharpen! There’s always an optimal level of sharpening that makes your images pop.
- In the below picture I have sharpened the details and radius.
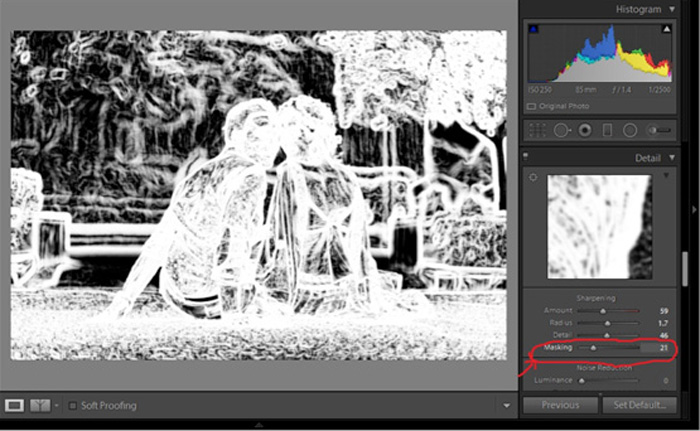
- A great tool in Ligthroom is the ability to add a mask onto the sharpened areas. Ideally, we only want to sharpen our subject – in this case the couple – and not other elements. Usually when you sharpen an image everything in the image gets sharpened but by using masking we can control how much area we want to sharpen.
- By holding down the “alt” key (on a Mac) – you can adjust the slider to adjust the sharpening to your liking. The white areas WILL be sharpened, and the blacks WONT. Adjust the slider to be able to see the outlines in your subjects – and you’ll have a properly sharpened image!
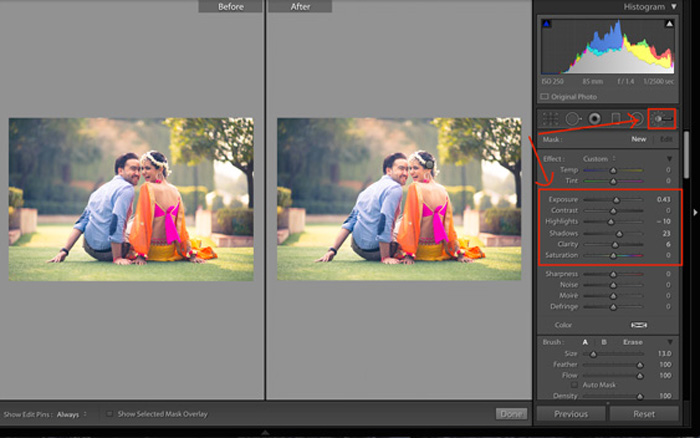
7) Bonus: Going for the win – using the adjustment brush
- If you’ve followed the steps above – your photos are technically ready. If you really want to give your photos a special touch, you have to master the adjustment brush. This opens up a VAST array of dodging and burning techniques that can make the final difference between a great photo and an excellent one!
- The Adjustment Brush tool allows users to fix small sections of photographs or images without changing the entire photograph. Different adjustments can be made to photograph and these effects range from brightening the photo to adding depth to increasing contrast.
- As you can see in the below picture I have used the Adjustment brush and added exposure on their faces. You can dodge and burn to your hearts content this way.
8) Bonus #2: Get a vignette using a radial filter
- Vignettes mimic how certain older lenses and cameras would leave dark shadows on the fringes of a photo.
- I always feel adding a little vignette in your pictures (especially people pictures) make them stand out by directing the viewer to the centre of the frame. Here, I have added vignette using the radial filter as you can control the area which you want under the filter.
- In the below picture you can see that I have reduced the exposure of the area outside the filter – thereby creating a controlled vignette.
- Another way of adding vignettes in Lightroom is to use the “vignette” tool – but I prefer using the radial filter as it gives us more control.

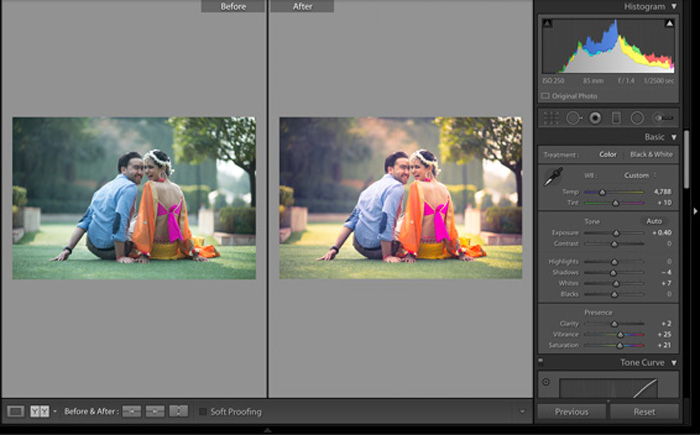
9) The final review
Once you feel you’ve done – always compare the before / after. It’s easy to get carried away while editing a photo and wind up with overkill – if you feel you’ve done too much you can easily go back and fix what you messed up. Post production takes practice – but it is very easy once you get the hang of it.
I hope this helps you. Coming soon – advanced post production using Lightroom for more creative ways to make your images pop! Questions? Ask away in the comments below!
Add a Comment