Lightroom is a brilliant tool for photographers, and helps us easily and quickly get our photos from the camera and out of the door to our clients. As an Indian Wedding Photographer, I use Lightroom for almost all my post production now. This post is in continuation to my previous post, Lightroom for Wedding Photographers. If you haven’t already, you should read that first before this one!
Welcome to the tips and tricks of Lightroom post production.
In this post we will go through little gems and features hidden within Lightroom that will help you create a strong and efficient workflow. (Workflow: something that you do again, and again (and again) so that you do it by rote. This includes everything after you take the photo – so all the steps that you follow right from how you eject memory cards to how you output photos once you’re done with them!). Let’s go through some tips and tricks while building your workflow.
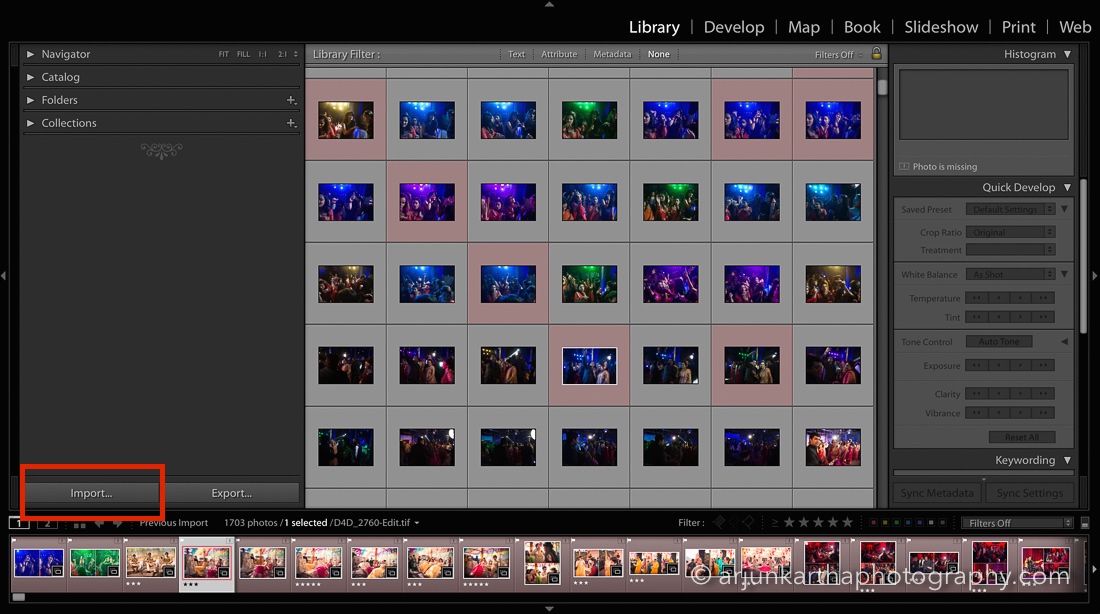
a. What’s the best way to import photos to Lightroom?
- After opening your Lightroom catalogue, click on the ‘import’ button (or SHIT+COMMAND+I) on the left hand side of the screen at the bottom and select the images you want to import in the catalogue.
- Selection of photos is not just the only part to be achieved here but also various settings that you should apply to the lot of images. This helps you to work on offline images, add metadata, and individuality to your images.
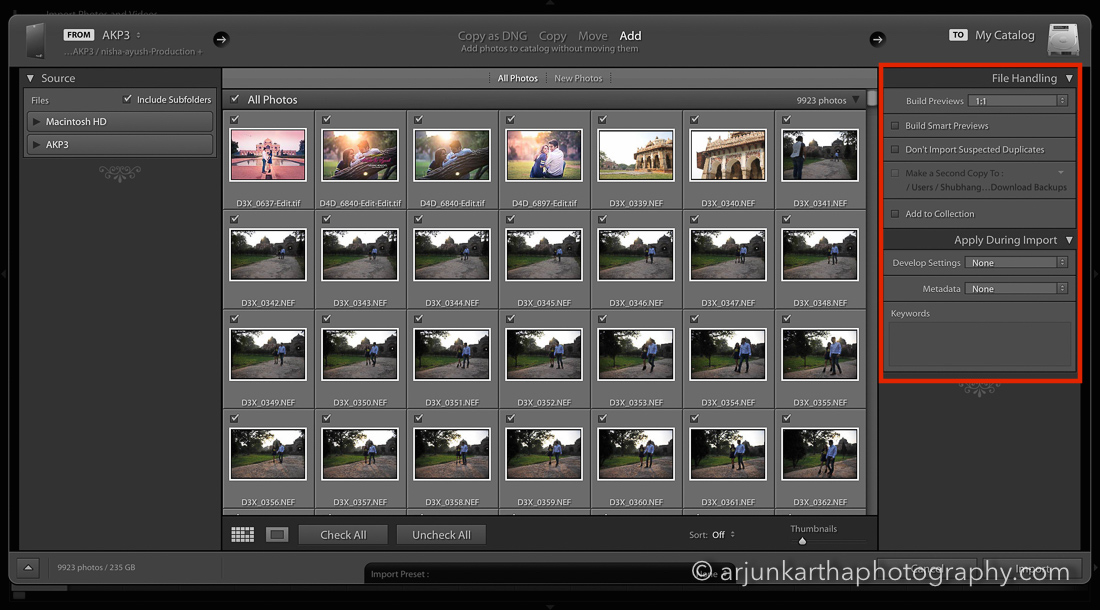
Lets take a look at the settings that one should know and also must apply to their images for better management of the Lightroom catalogue.
- File Handling:
- “Build smart previews” basically helps you to work on offline images and sync in all the develop settings to those images. This means that you don’t have to store those heavy images on your local hard disk (or worse, on your external hard disk) while working with them. Hello speed!
- “Don’t import suspected duplicates” helps you to ‘not import’ such photos which are repetitive in you folder you are importing, but personally i do not recommend enabling this (on the off chance that the computer screws up, you don’t want to NOT import photos you’ve taken).
- “Add to collection” helps you to add the images directly in any of your collections at the time of the import.
- Apply During Import:
- ‘Develop Settings’ gives you the ability to apply various presets on you images (for e.g.,- B&W or cyanotype). I personally don’t use this because I want to manually develop each of my photos and not apply a blanket develop setting to it.
- ‘Metadata’ helps you add extra metadata to your images in addition to what your camera applied (like the ability to tag your name and copyright information to the lot of images you are importing and also makes it searchable).
- ‘Keywords’,it the last setting you can apply to your images and it helps you to give individual tags (keywords) to particular lot of images while importing. (for example- you can add keywords like ‘Wedding’, ‘Couple’ ‘Love’, ‘Marriage’, to the wedding photography images). This may not seem like a big deal at first, but when you have tens of thousands of images in your catalogue (like me), it’ll help!
b. What’s the best way to select and curate photos?
When Lightroom was first introduced, it was touted as a combination of Adobe Bridge and Adobe Photoshop. If this doesn’t make sense to you, in the pre-Lightroom era, we photographers didn’t have a way of selecting images. When digital first came about, photographers didn’t take thousands of photos and selecting photos was a Light Table approach.
Today, from a wedding shoot we usually rack up thousands of photos – and selection of the images is a HUGE time consuming job. (Wedding photographers, you know what I mean.) Selecting photos is a very important step. You don’t want to miss photos because your photo selection workflow wasn’t efficient. Here’s how I go about it – but first, let’s understand the tools available to us.
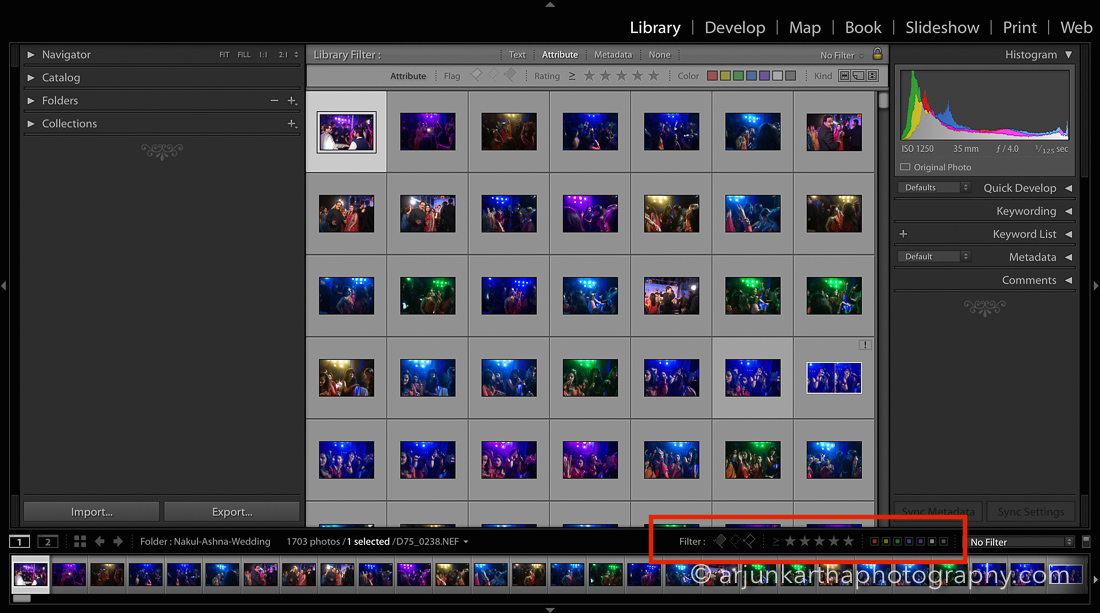
- Labels: Lightroom gives us another option to rate our images with coloured labels. You can assign what these colours mean to your photos depending on your workflow. You can remove any label by pressing the same number that designates the colour.
Keyboard Shortcut
Set Label to Red: 6
Set Label to Yellow: 7
Set Label to Green: 8
Set Label to Blue: 9
Set Label to Purple: Right Click with Mouse, Select Colour Label, Purple
- Stars: We can also assign 1-5 star ratings to our images. This feature can be extremely helpful, especially when you want select images during the shoot without having to delete images. If you ever want to remove the stars from an image you can select the image and press “0” (zero).
Keyboard Shortcuts
1 Star Rating: 1
2 Star Rating: 2
3 Star Rating: 3
4 Star Rating: 4
5 Star Rating: 5
0 Star Rating: 0
- Flags: When you want to pick an image you can press “P” on the keyboard to flag that image as a pick, and if you want to remove the flag you simply press “U”. When you want to reject an image you press “X”, and when you view your images in the grid or loop view the rejected images are greyed out. This makes it easy to visually identify which images are flagged as rejects.
Keyboard Controls
Flag as Pick: ‘P’
Remove Flag: ‘U’
Set as Rejected: ‘X’
These tools are actually very helpful in keeping your images selected the way you want, moreover working on bulk images at one go can sometimes become very tiresome, so this is where all the selection tools helps in selecting and organising the images the way we want and work on them in an efficient manner.
How do I this?
Like everything in Adobe, it’s really up to you how to use it. This is what I do:
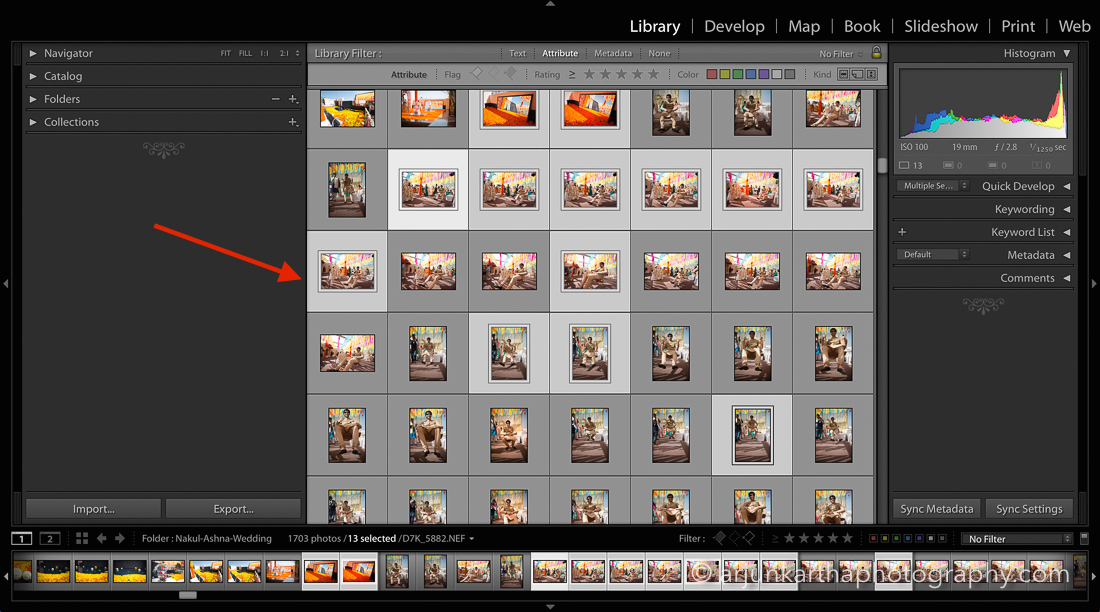
- First Pass: When I’m first looking at the photos, I make a first pass and very quickly as I’m going through them use labels to choose my “oh, this is good” and “hmm, I’ll use this as a backup of this moment” using the RED and YELLOW labels. I use the other colours to set apart certain images of interest that I may want to keep aside (fun photos, behind-the-scenes photos etc.) Later on, if I filter by RED I know that these are my MUST HAVE images.
- Second Pass: I start editing all my RED photos after I’ve done my initial shortlist. The ones I develop and like (and want to keep), I’ll assign a PICK flag to (Keyboard P).
- Curation: From every shoot, we all know that of all the deliverable photos, we may want to choose a couple that are portfolio worthy, or images that you want to highlight to the client. This is where I use the stars. I’ll filter by “flagged”, which will show me all the images that I’ve decided to deliver and assign either 4 or 5 stars to the ones I deem outstanding.
How does this help? Of the ten thousand photos I may have taken at a wedding, a RED filter will bring it down to the number of images I think are usable – a FLAG filter on top of that will show me the images I’ve developed and have decided to deliver – and a STAR filter on top of that will show me the outstanding ones!
c. Some very important points to keep in mind while developing your images in Lightroom:
Since we’ve already discussed how to edit images in ‘Lightroom for wedding photographers – tutorial 1’, in this section i have just main pointers to keep in mind to have a better workflow.
- Lightroom Catalogue Management: One point of debate among Lightroom users is how to allocate images to catalogs. Some prefer keeping a number of small catalogs, while others prefer keeping a master catalog with all images stored within it. In earlier days, people did maintain various catalogues with less images, however, Lightroom has continued to grow and improve in performance – so much so that huge catalogs (even those with over 100,000 images!) are hardly a concern performance-wise. (Use the “optimise catalogue” option to fix it if you feel it’s slow).
- Where should be the source files (RAW) of a catalogue?: According to me, i always prefer having my source files in an external hard drive (the biggest reason is it gives you extra space on your workstation, which is always good for better speed). Never store your photos locally.
- Where should the Lightroom Catalogue (.lrcat) file be?: I always prefer having all my catalogues in my main work station, and always keep updating the backup of those LR catalogues in my external hard drives for being safe in case of the loss of data. Always backup these catalogue files!
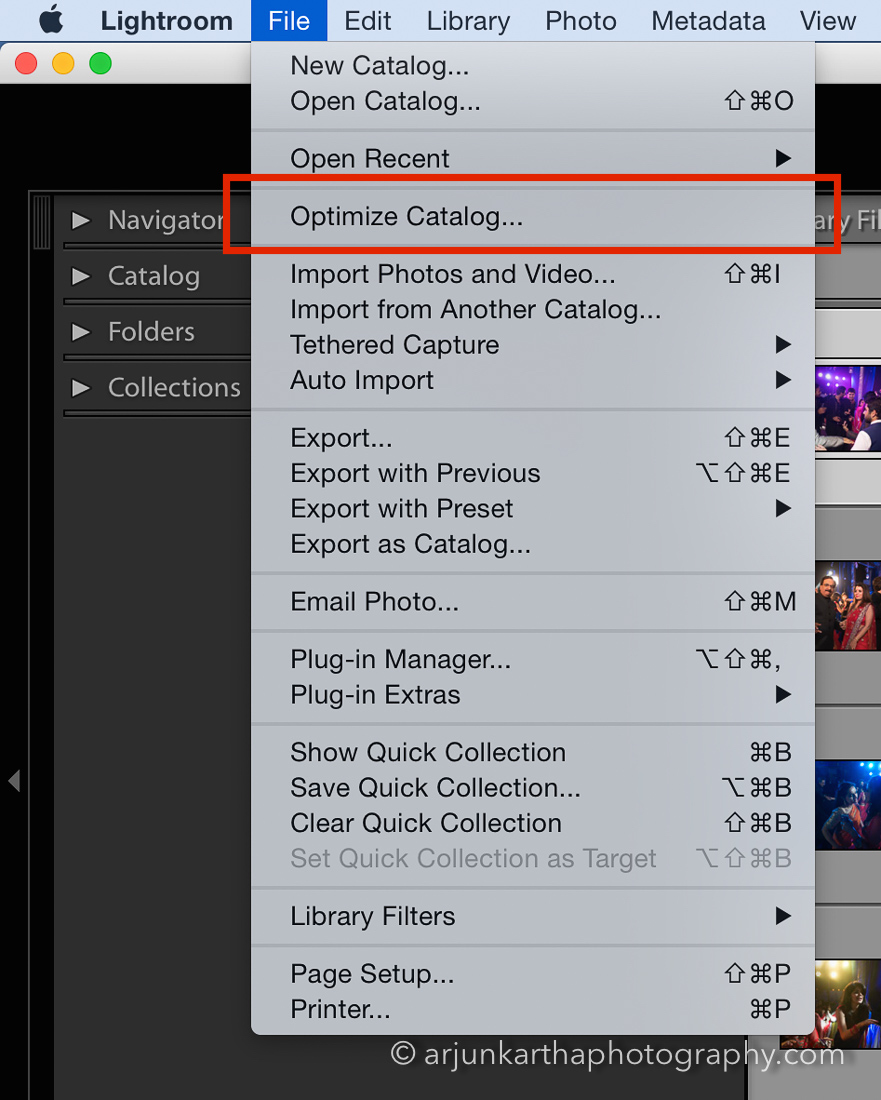
- My Lightroom has become really slow, what to do?: Yes, i agree, one may face this issue of their Lightroom working a little slow sometimes, but there are few key things you should keep in mind to optimise you Lightroom Catalogues.
- Open Lightroom, go to file on the top, and select ‘Optimise Catalogue…’
- At the time of import always make sure that you build normal previews / smart previews to fasten your workflow.
- I have a lot of images to post process, how do i process all of them in less time?
- Using Lightroom means you should be able to use all the options that are available to you, which is you should be able to bulk process your images and not waste time doing same thing for every image.
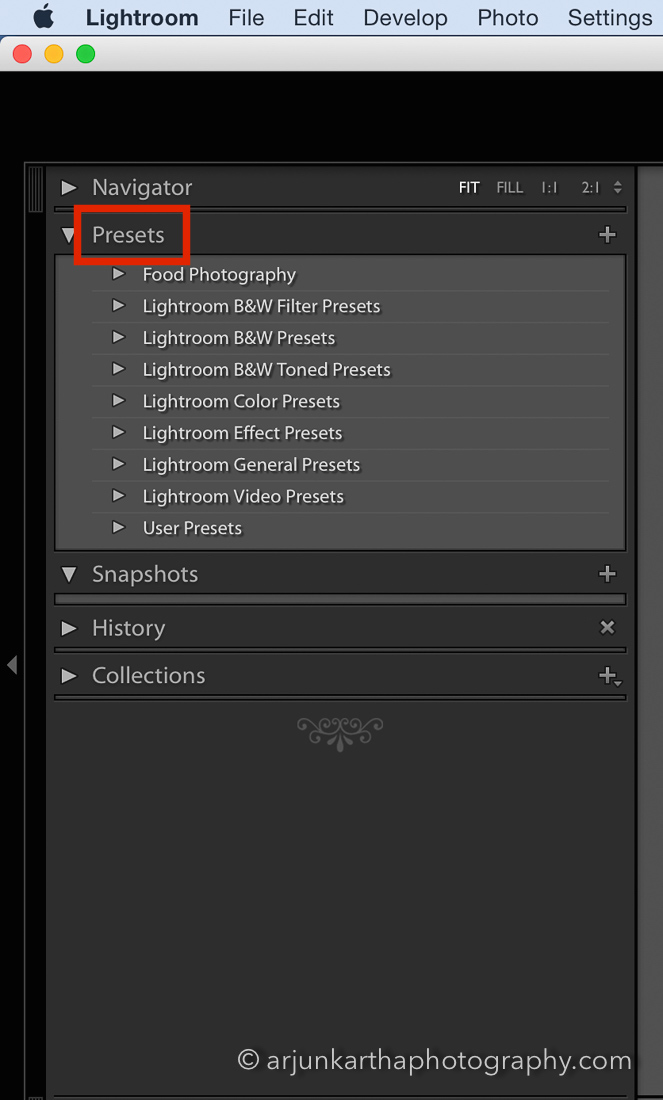
- For Lightroom users, making use of develop presets can be an excellent way to reduce the amount of time that you spend in Lightroom. When it comes to presets you can either create your own or use those created by Lightroom. One of the great things about Lightroom Presets is that you can easily tweak the settings to suit a particular photo.
- Keep creating different presets for similar kind of images, so that it helps you to bulk process you images.

d. What’s the best way to export photos?
In Lightroom, you do not “save” photos in the traditional sense. Instead, you export photos. You can export photos in various file formats suitable for a wide range of uses. For e.g., high resolution images for printing, medium resolution images for online usage, etc.
- Select Photos to Export: Select photos from the post processed images you want to export
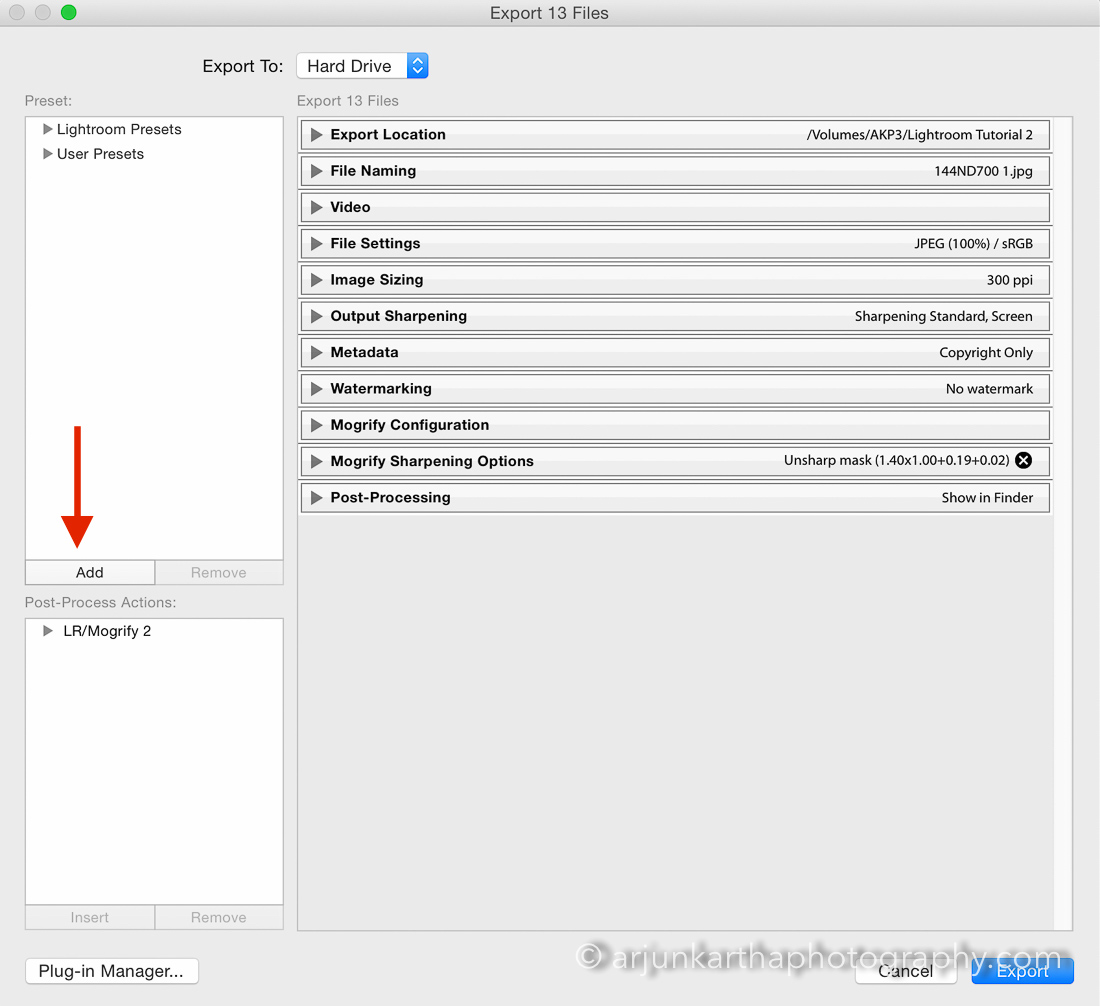
- Open the Export dialogue box: Choose File > Export or click the Export button in the Library module. Then, choose Export To > Hard Drive in the pop-up menu at the top of the Export dialog box.

- Specify Export Options: Specify a destination folder, name of the files to be exported, and other various options in the Export dialog box panels (e.g., – Image Sizing, Watermarking, etc)

- Save the export settings: You can also create export presets, so that in future you don’t have to change all the settings all again for the same purpose.
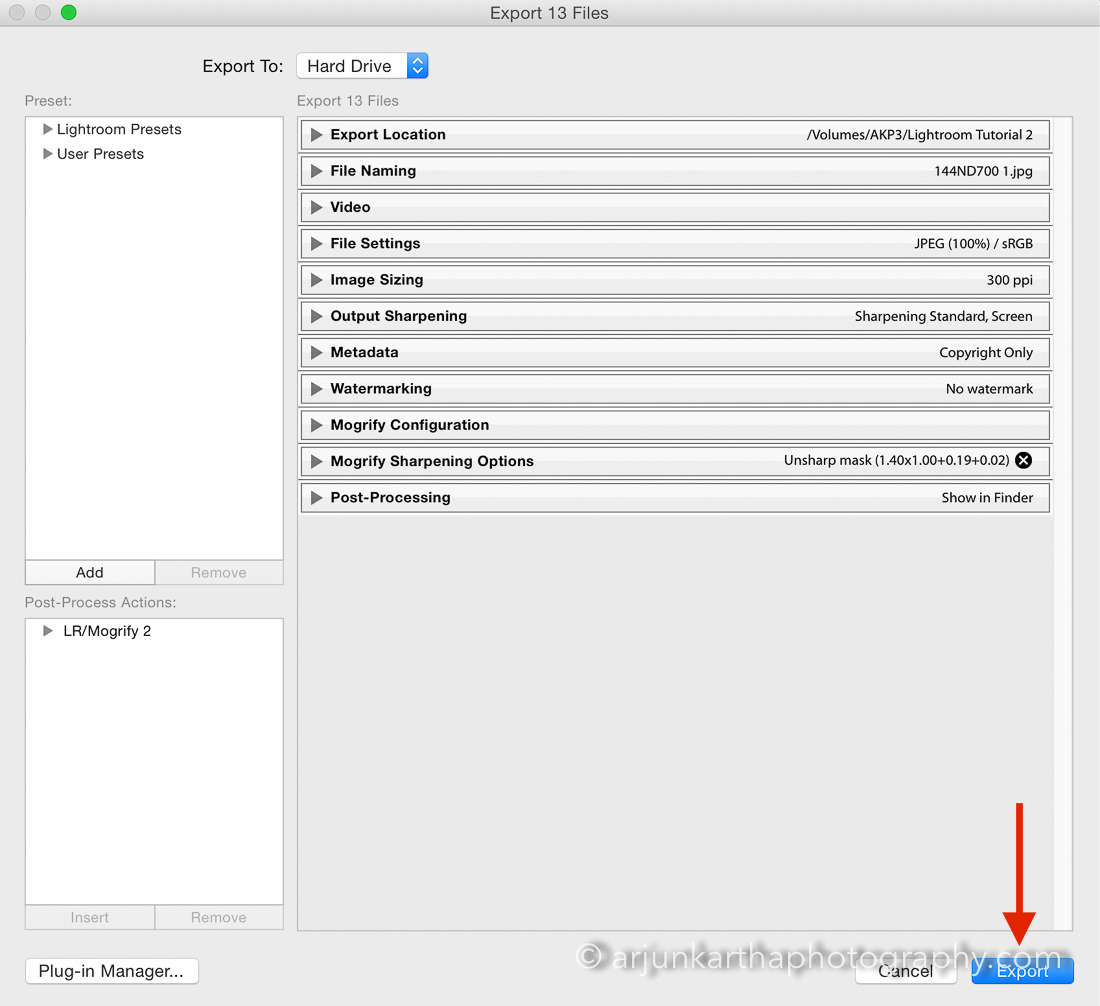
- Click Export.
And there you go! These are some of my favourite features within Lightroom that should help make you a power user in no time at all!
Your Turn
Are there any other features of Lightroom you’d like explained? Ask away in the comments section and I’ll be happy to dedicate future posts to it. SUBSCRIBE to this blog (using the box at the top right of this page) to get these in your inbox. Thank you!
Add a Comment